
There's a reason why 5kg spools are not as common, but they're great when you want to print a lot of stuff in bulk, and don't want to worry about running out mid-print. I modified my ELEGOO Centauri Carbons with a BigTreeTech SFS v2.0 smart filament sensor and some other changes to better handle them, as it's really not designed for it.
This is part of a series of modifications I'm making to improve my €300 Centauri Carbon 3D printers. What they've become is an amazing base for customisation, as unlike other brands and after a little bit of community pressure, ELEGOO released the source for their firmware along with detailed 3D model files of various parts of the printer. For me, this puts them up there with Prusa in terms of open-ness, if you're willing to accept the many quality assurance issues and okay support. Prusa has spoiled me, and based on the direction I see with the Centauri Carbon 2, I don't think we'll see this again from ELEGOO.
My Prusa Core ONE is an amazing machine. I can throw just about any print at it and I know when I come back, it'll be sitting there without any issues. The Centauri Carbons serve a different purpose; they're the start of my print farm, and they're intended to crank out the same parts over and over, with one filament. It's okay that they require some tinkering and dialling to match the quality of the Prusa, as I just need to get it right once, and then they can repeat the same thing. They run COSMOS as their firmware allowing me to use standard tools that interact with Klipper/Moonraker, and you can see more information on that in my previous video.
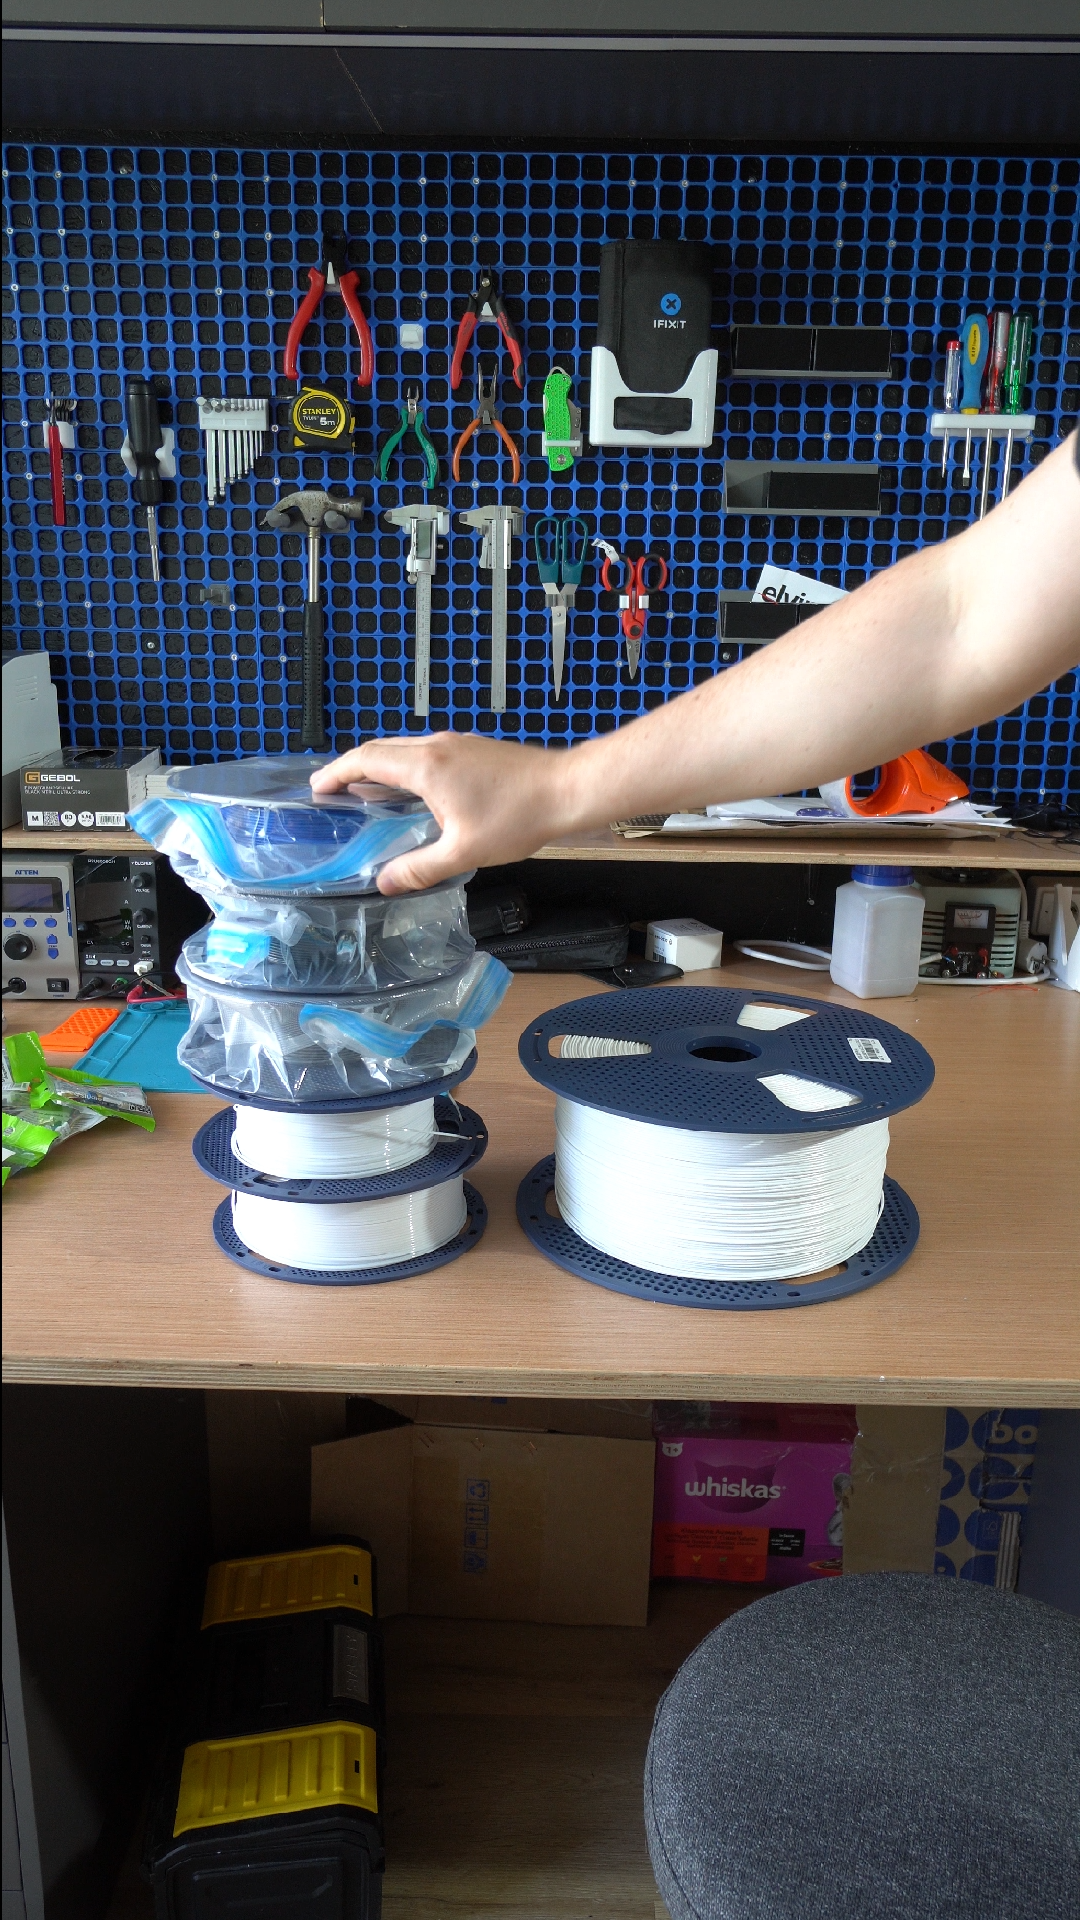
I've been using SUNLU 5KG PETG spools for a while now, and I can get them for less than €45 per spool. Quick math tells you that's less than €9/kg, which is a great price. While you can absolutely find cheaper spools, what matters here is consistency; I need to know that I can continue to buy more of it, and that it'll be in the right colour. The reason for choosing 5kg spools is so that I can load it up once, and keep printing without having to think about reloading the printer. But also, this does come with some risk - if a spool becomes impossibly tangled or broken in any way, I waste 5kg of plastic instead of just 1kg with a regular spool.
To help prevent those issues from occurring, I want to detect if a spool becomes tangled or stuck in any way. This should prevent a big issue from becoming a bigger issue. The BigTreeTech SFS V2.0 is a smart filament sensor that not only detects if the filament has run out in a standard way through a switch, but it also measures the amount of filament passing through it. This information is passed back to Klipper, that can then pause the print if the amount of filament passing through the sensor is less than the filament it thinks it just printed.
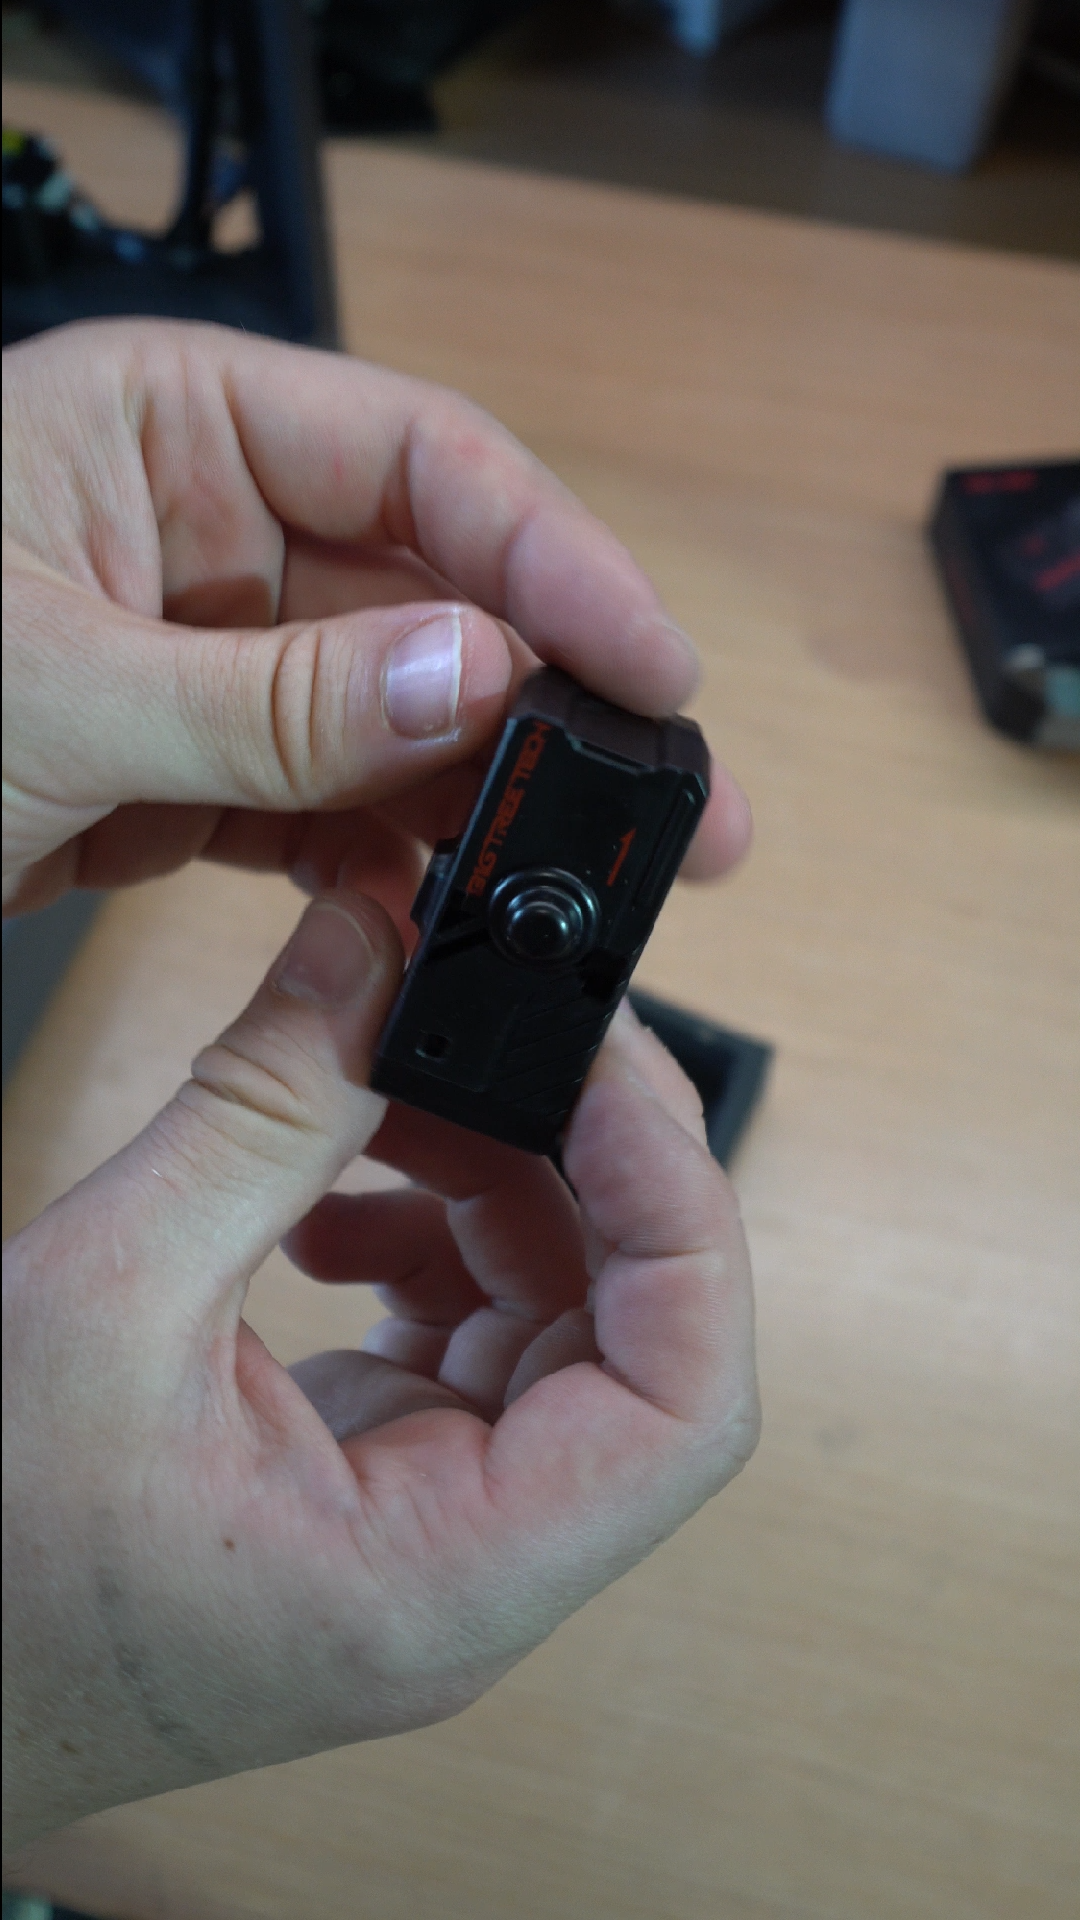
While multiple filament systems could also solve the filament runout problem by automatically switching to a new spool, I didn't want to introduce that complexity; it's a lot more moving parts. ELEGOO's new CANVAS system is very well priced at €45, but this costs a fraction at ~€14, while requiring fewer changes to the printer overall.
I'm not the first one to integrate a BTT SFS V2.0 with a Centauri Carbon. However previous solutions had to work around the limitations of the stock firmware, which can't be easily modified. This solution relies on an ESP32 microcontroller connected to the SFS, which would then read the stats from the printer over WiFi and send a pause command if things weren't as expected. I really don't like the idea of having to go over the network for something that is built onto the same device, so I came up with a way to wire it in directly to the printer, taking advantage of COSMOS' configurability to make it work natively.
The step-by-step guide
You don't just benefit from this if you've got a 5kg spool. If you do very large and time-consuming prints, this can help save your prints if things get tangled. I do remember once getting woken at 2am up by the clicking noise of my Prusa printing air on a multi-day print. Not fun.
Before starting, make sure you've got some zipties on hand, as you'll need to cut a few to get the wires out, and they will need replacing. Also, follow the first 3 steps of this official guide to access the motherboard. I would also recommend removing the right side panel, as this makes accessing the wires way easier.
We start off by removing the old filament sensor. One screw from the side panel and it comes off, and then it's time to remove the old wire. It needs to be pulled out of the sleeving and down through the bottom of the printer. At the same time, feed in the new wire that was provided in the box of the SFS V2.0, and make sure about the same amount of cable is sticking out the top, ready for it to be plugged in. You should have the 4-pin connector at the top, and the 2x 3-pin connectors at the bottom.
Once you've got the old cable out, the plastic connector housing on the mainboard side needs to be salvaged.
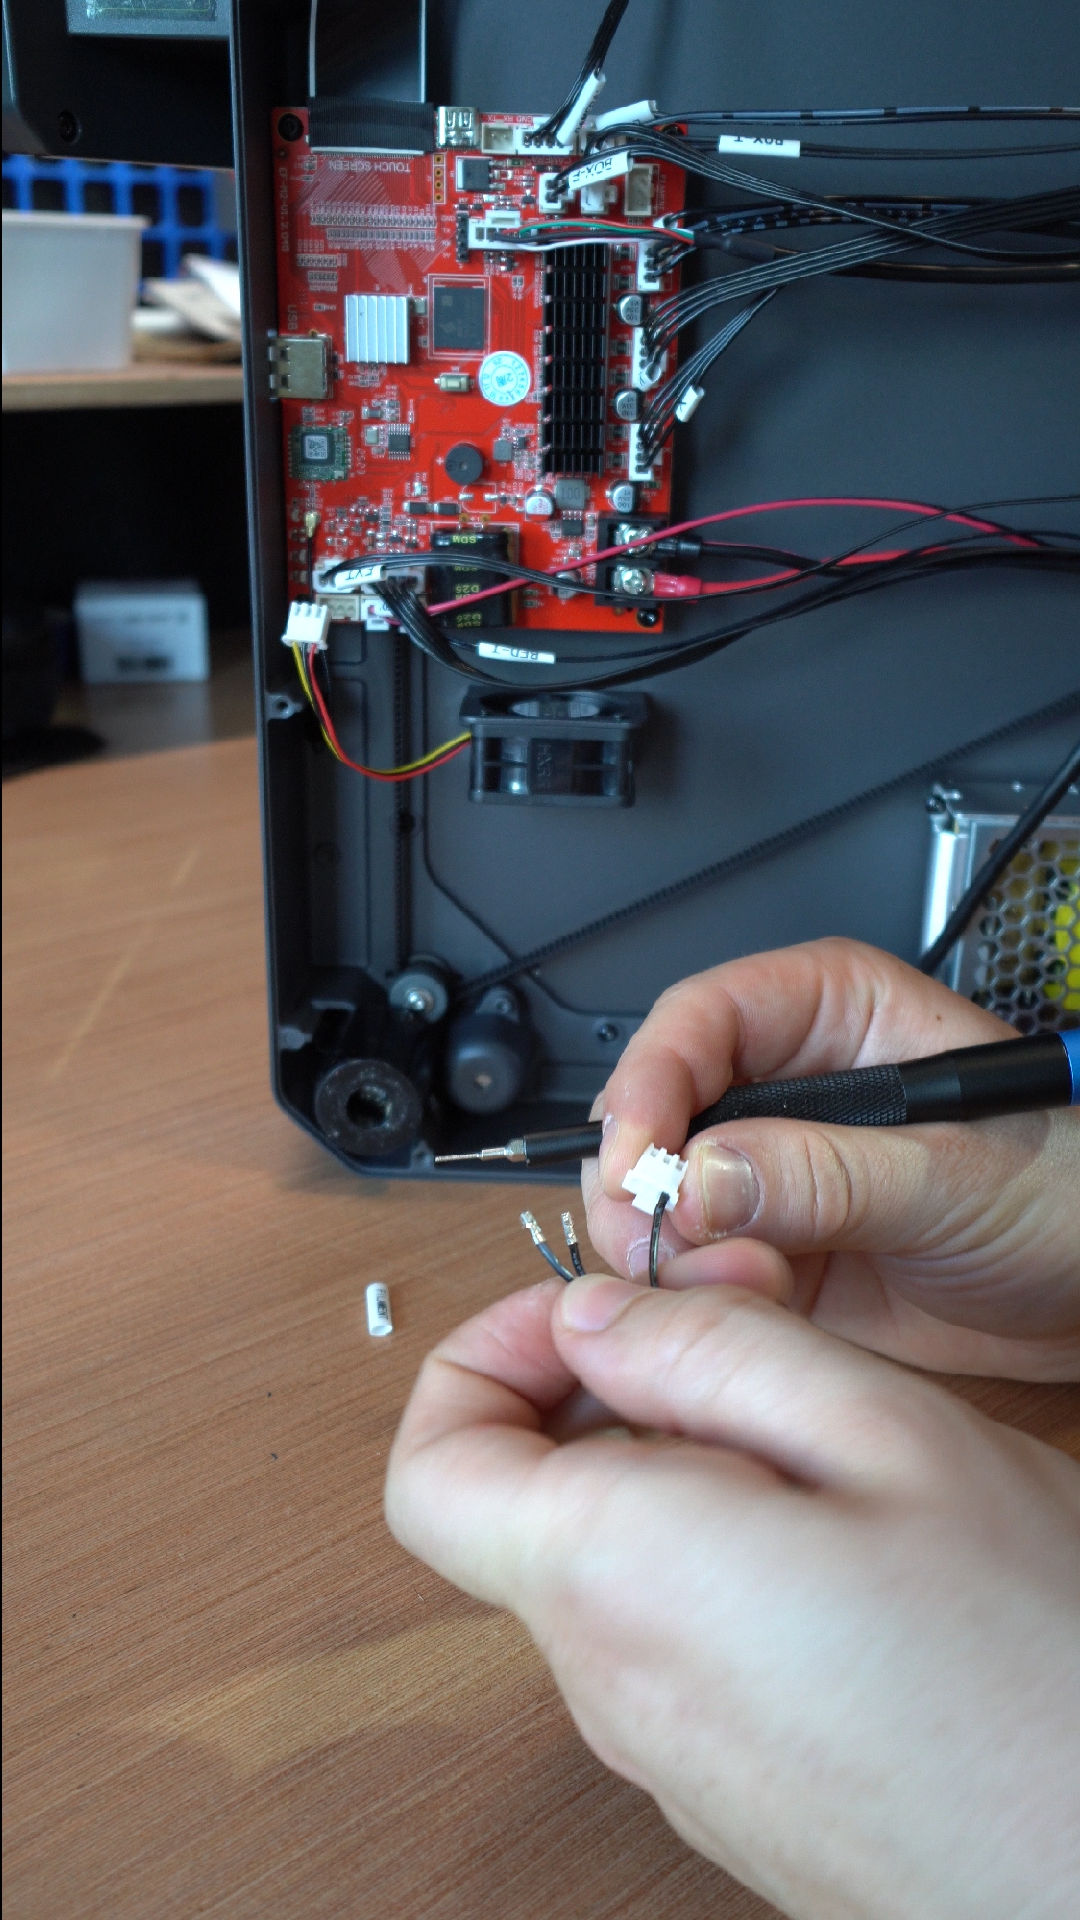
Remove the pins from the housing by taking a small screwdriver or SIM card ejection tool, and pushing down on the little metal clips. Make sure to push the clips down first, then apply force to pull the wire out of the back - if you try to do both at once, it'll just get stuck and you'll need to push the wire back in to start again.
Repeat the process on the BTT SFS wire. It comes with two plugs, and the 4 wires need to be de-pinned from the both of them.
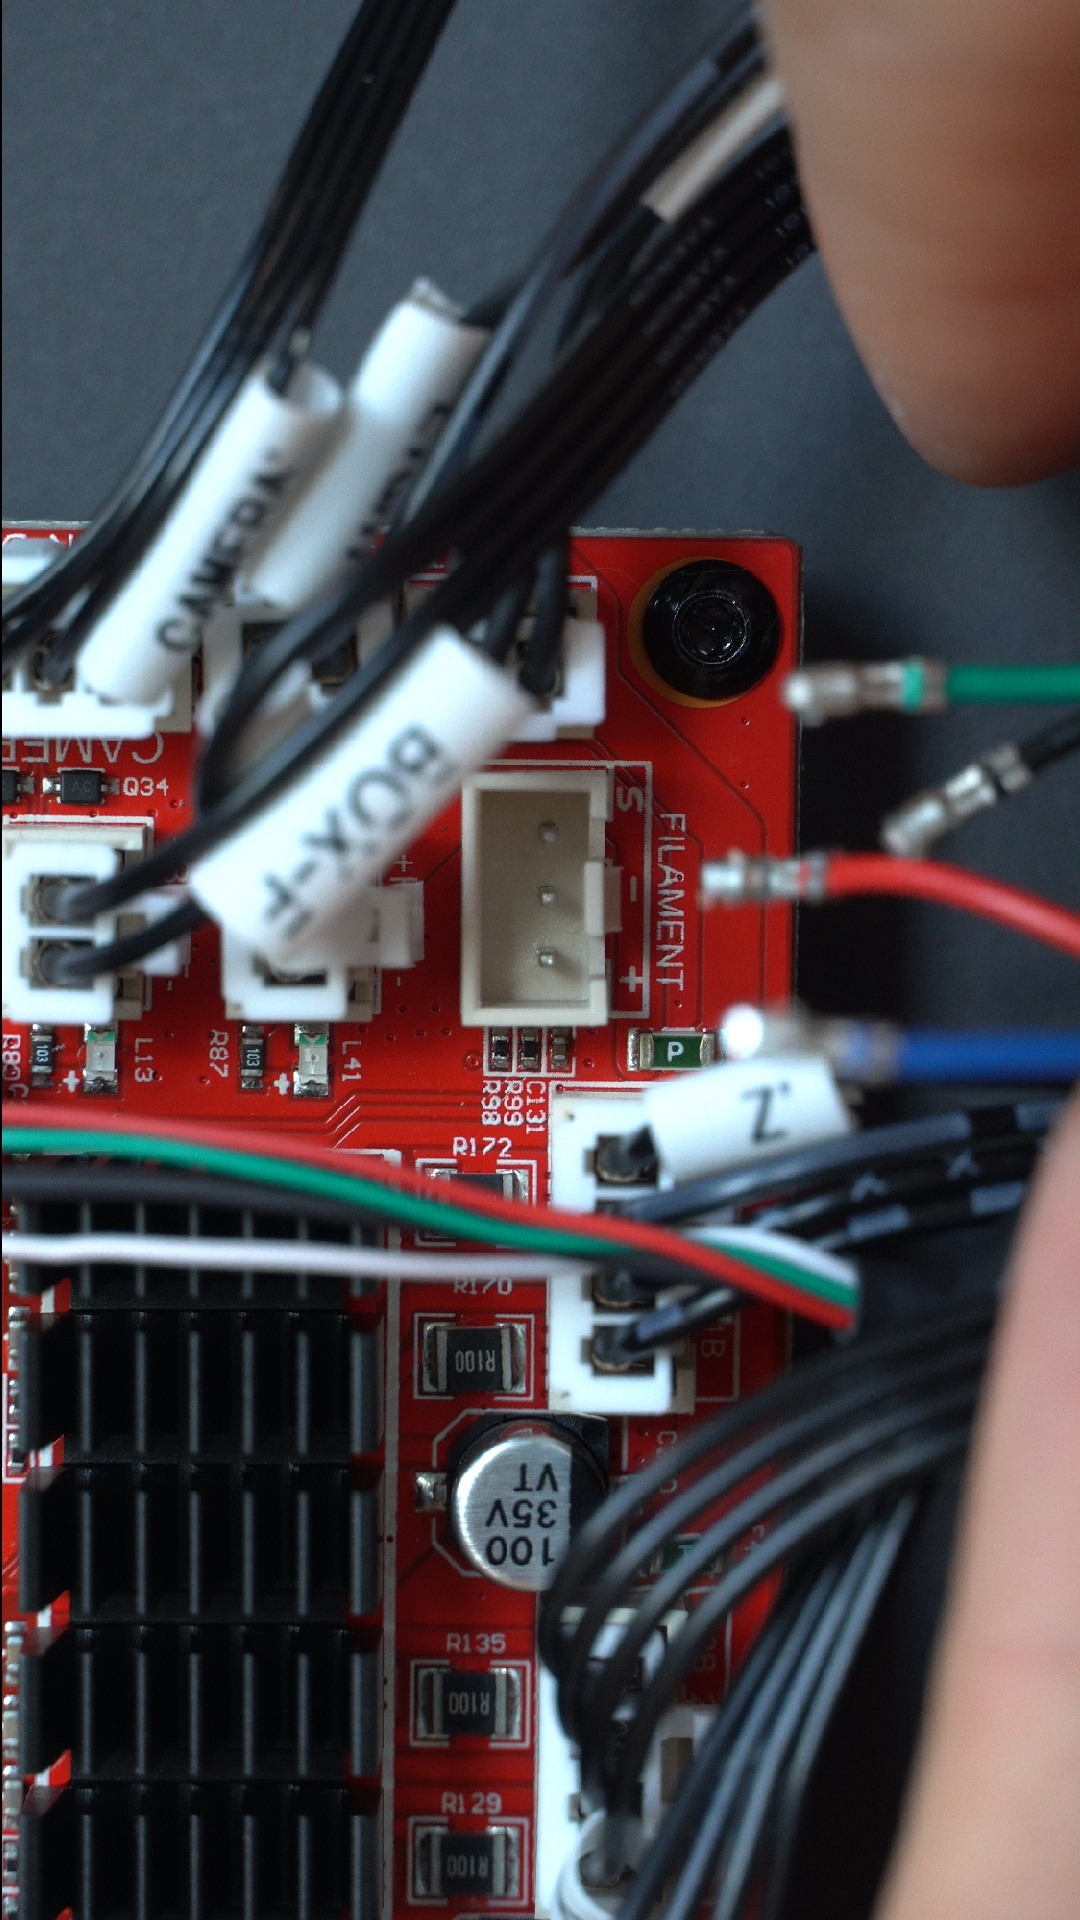
We're now left with 4 wires and a plug that fits only 3 of them. Taking a look at the mainboard where the socket for this is, it tells us which pin needs to go where.
- The positive (red) wire goes in the bottom-most slot
- The negative (black) in the middle
- The signal (blue) goes in the top
Here's a picture from the official manual, of course showing the connection to BigTreeTech's own custom mainboards.
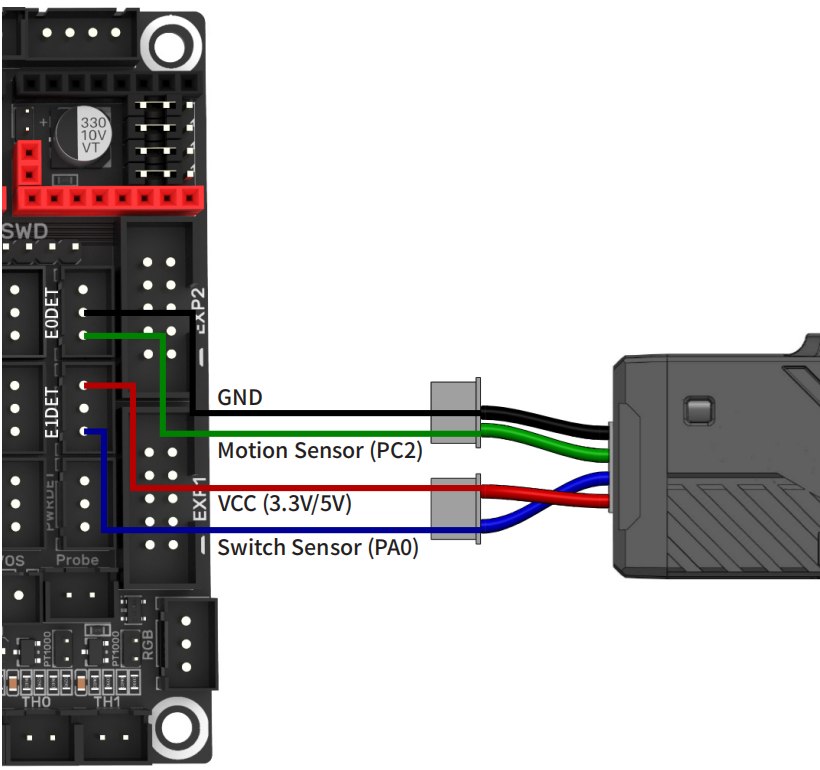
With this setup, the SFS will now act exactly like the previous filament runout sensor did. But of course we didn't do all this work just to have the same result, and we need a new home for the green wire, which is the one that gives a signal to the printer saying how much filament has moved through the sensor.
There's no open spots on the Centauri Carbon mainboard, as obviously it was built only to support the wires that it ships with. But that doesn't mean we need all of them. The fan that cools the mainboard has a yellow tachometer wire, whose only purpose is to report the speed of the fan. The fan will still function perfectly normally without it, and the only risk is that we won't know if that fan is stuck or not spinning. If that does happen, you've got bigger issues anyway.
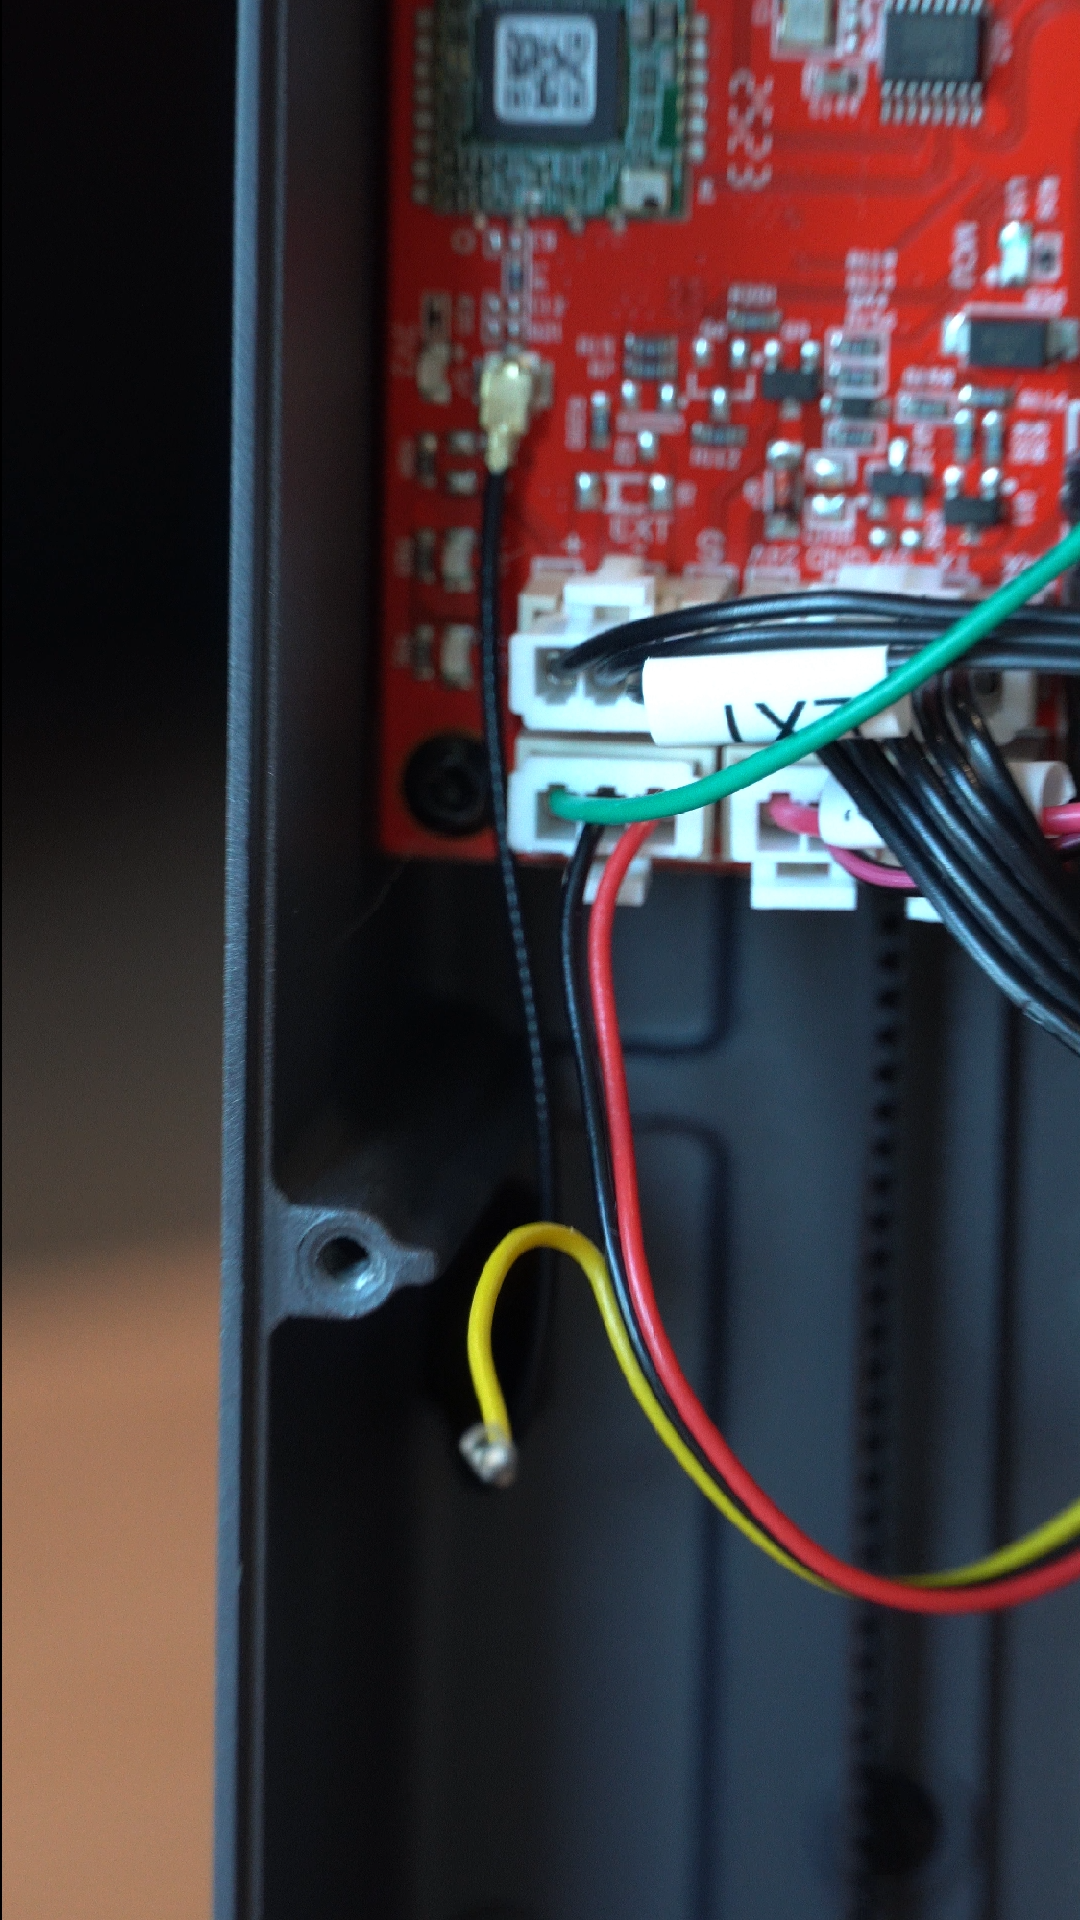
Unplug the mainboard fan, and depin the yellow wire from it. Make sure to tuck that back and wrap some electrical tape around it so it doesn't accidentally make contact with the metal frame. We can now insert the green wire into the empty slot, and plug it back in.
With that in place, it's time to button everything up. Make sure all the wires are nicely managed together and zip tied back down, to ensure they don't make contact with the belt. The cable that came with the SFS is a little longer than the stock one, but the excess can be tucked into the zipties.
Finally, to mount the BTT SFS V2.0, I found that somebody had already done the work for me! Print this mount from Printables, then use the screw that came with the original filament sensor to mount it to the side of the printer. Unfortunately as the cable comes from the back you'll need to mount the SFS upside down to make it route cleanly, but it works the same in either direction. Screw in one of the bowden tube connectors included in the box to the top, and connect the PTFE tube. Job done. What's really nice is that the mount holds the sensor further from the side of the unit from the original, which works great with larger spools.
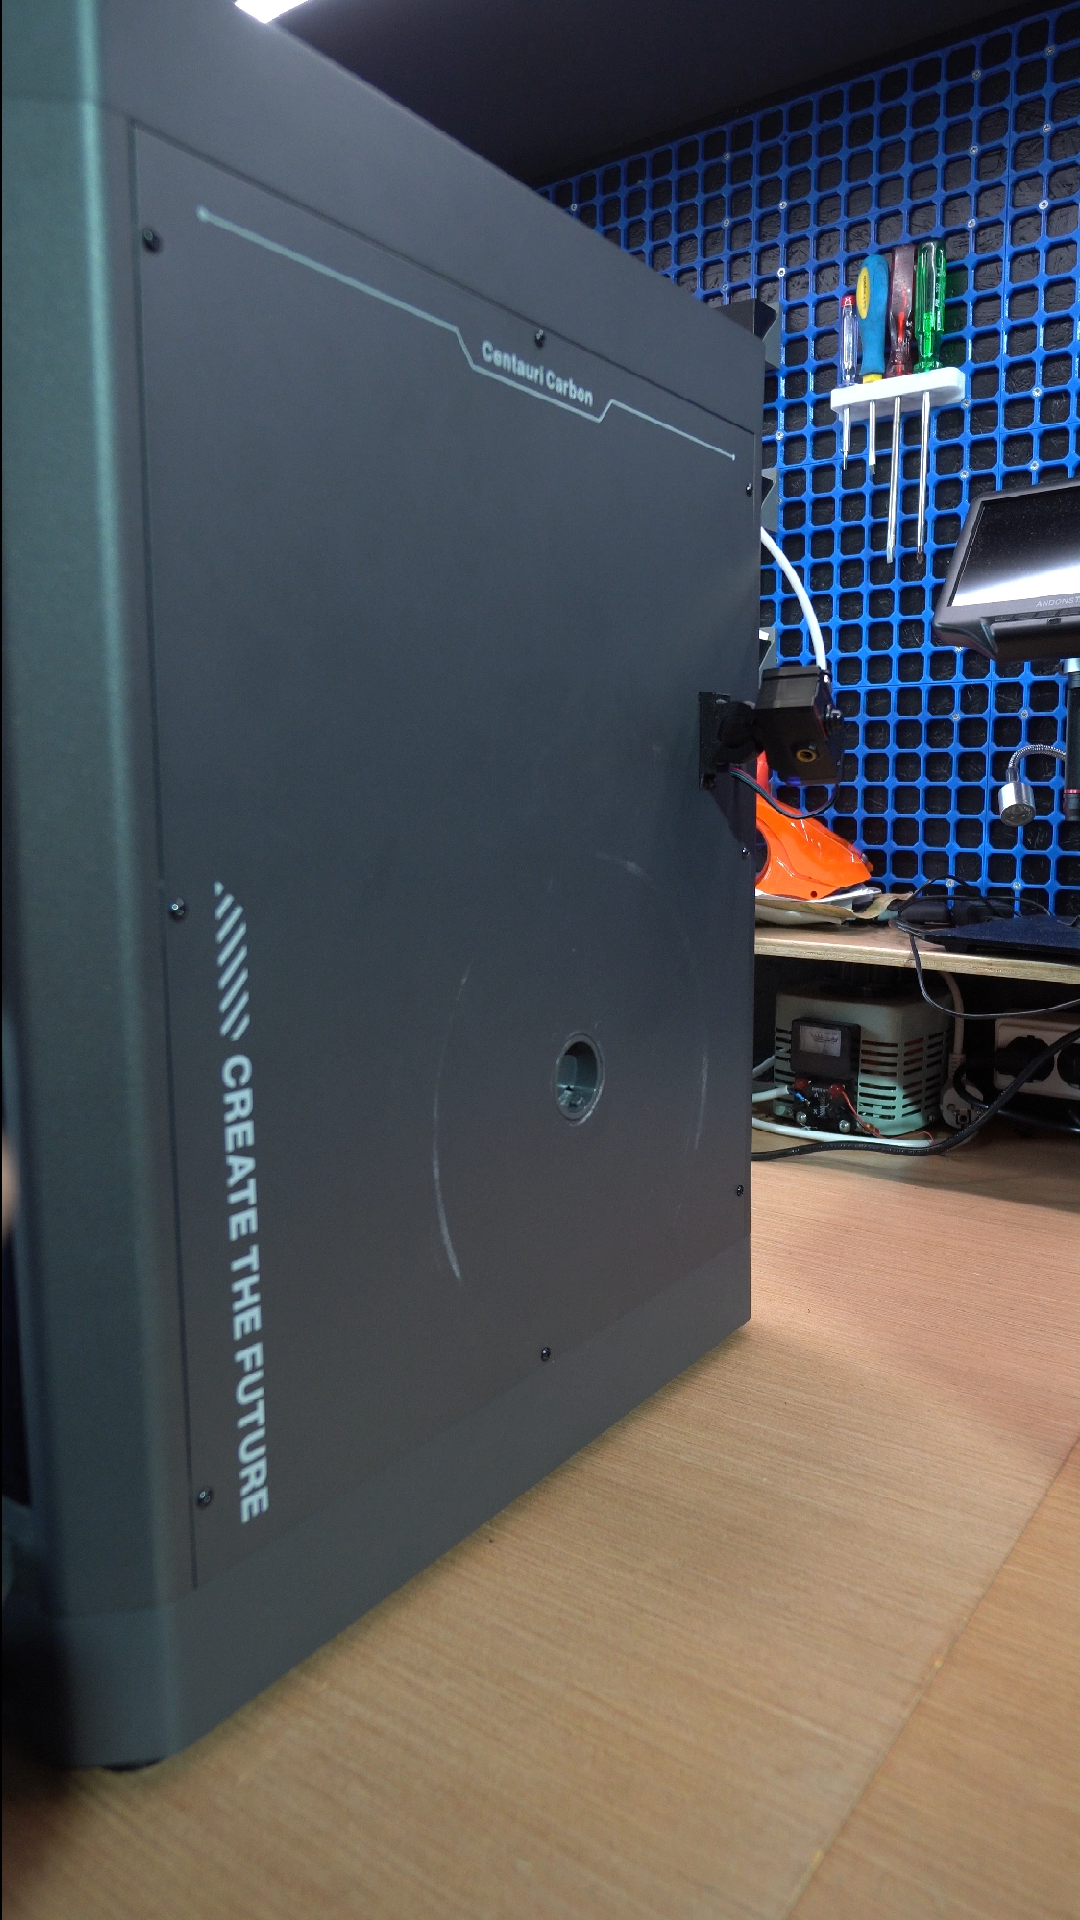
The beauty of this entire modification is that the printer will continue to act normally on the software side, so if you need to go back to stock firmware to check something out, the only change is that the fan speed will be reading the filament motion instead.
The software side
To make the magic happen, first make sure you're running COSMOS. As of writing it's in very early beta stages so it's not for the faint of heart, and recovering from a bricked state will require a certain level of knowledge and the assistance from the fine folks in the Discord server. I hope that by the time you read this article, things are much more stable! However, this does also mean that the configuration that I'm modifying is subject to change, so there's a chance that the steps I outline below won't work for you. I believe in you; you'll figure it out. Let others know in the comments below.
I'm assuming you already have some knowledge of how Klipper and Mainsail works here. We're going to be modifying some configuration files through the web interface.
First off, go to the printer.cfg file. Drop this bit of configuration in the top of the file:
[filament_motion_sensor encoder_sensor]
switch_pin: PG6
detection_length: 5
extruder: extruder
pause_on_runout: false
event_delay: 3.0
runout_gcode:
  RESPOND TYPE=echo MSG="Filament stuck"
  PAUSE STATE=runout
insert_gcode:
  RESPOND TYPE=echo MSG="Filament is inserted"
This sets up our filament motion sensor. Note that I'm following the same logic as defined in the filament switch sensor in COSMOS, running custom gcode instead of using the pause_on_runout configuration. This will automatically unload the filament when triggered, which a normal pause won't do.
I chose a detection_length of 5mm. While on the marketing BigTreeTech says it can detect 2.88mm, if you set it too close, any kind of timing delay or elasticity in the filament can cause it to falsely trigger. All it needs to do is initiate a pause if it thought that 5mm moved, but the sensor did not move that amount.
Save the file, but don't restart the firmware just yet. The switch_pin is still in use by the mainboard fan tachometer, and Klipper will just fail to start as it's in two places.
Next, go to klipper-readonly/machine.cfg. Scroll down near the bottom and find this part:
[temperature_fan mainboard]
pin: PG16
tachometer_pin: PG6 # <-- Remove this line
min_temp: 5
max_temp: 80
target_temp: 60
min_speed: 0
sensor_type: temperature_host
control: pid
pid_Kp: 2
pid_Ki: 5
pid_Kd: 0.5
It's a simple case of deleting the line that says tachometer_pin. Then hit save & restart. The fan will continue operating normally, but now it won't report its speed.
There's one major caveat here. You may have noticed we modified a file in a directory that clearly says readonly. What this really means is that the contents of the file will be reset and overwritten whenever you do a firmware update. This is a pain, but unavoidable as it's only possible to add or change values with printer.cfg, not to remove. Each time you do a firmware upgrade, Klipper will fail to start until you go back in and manually remove this line again.
The result
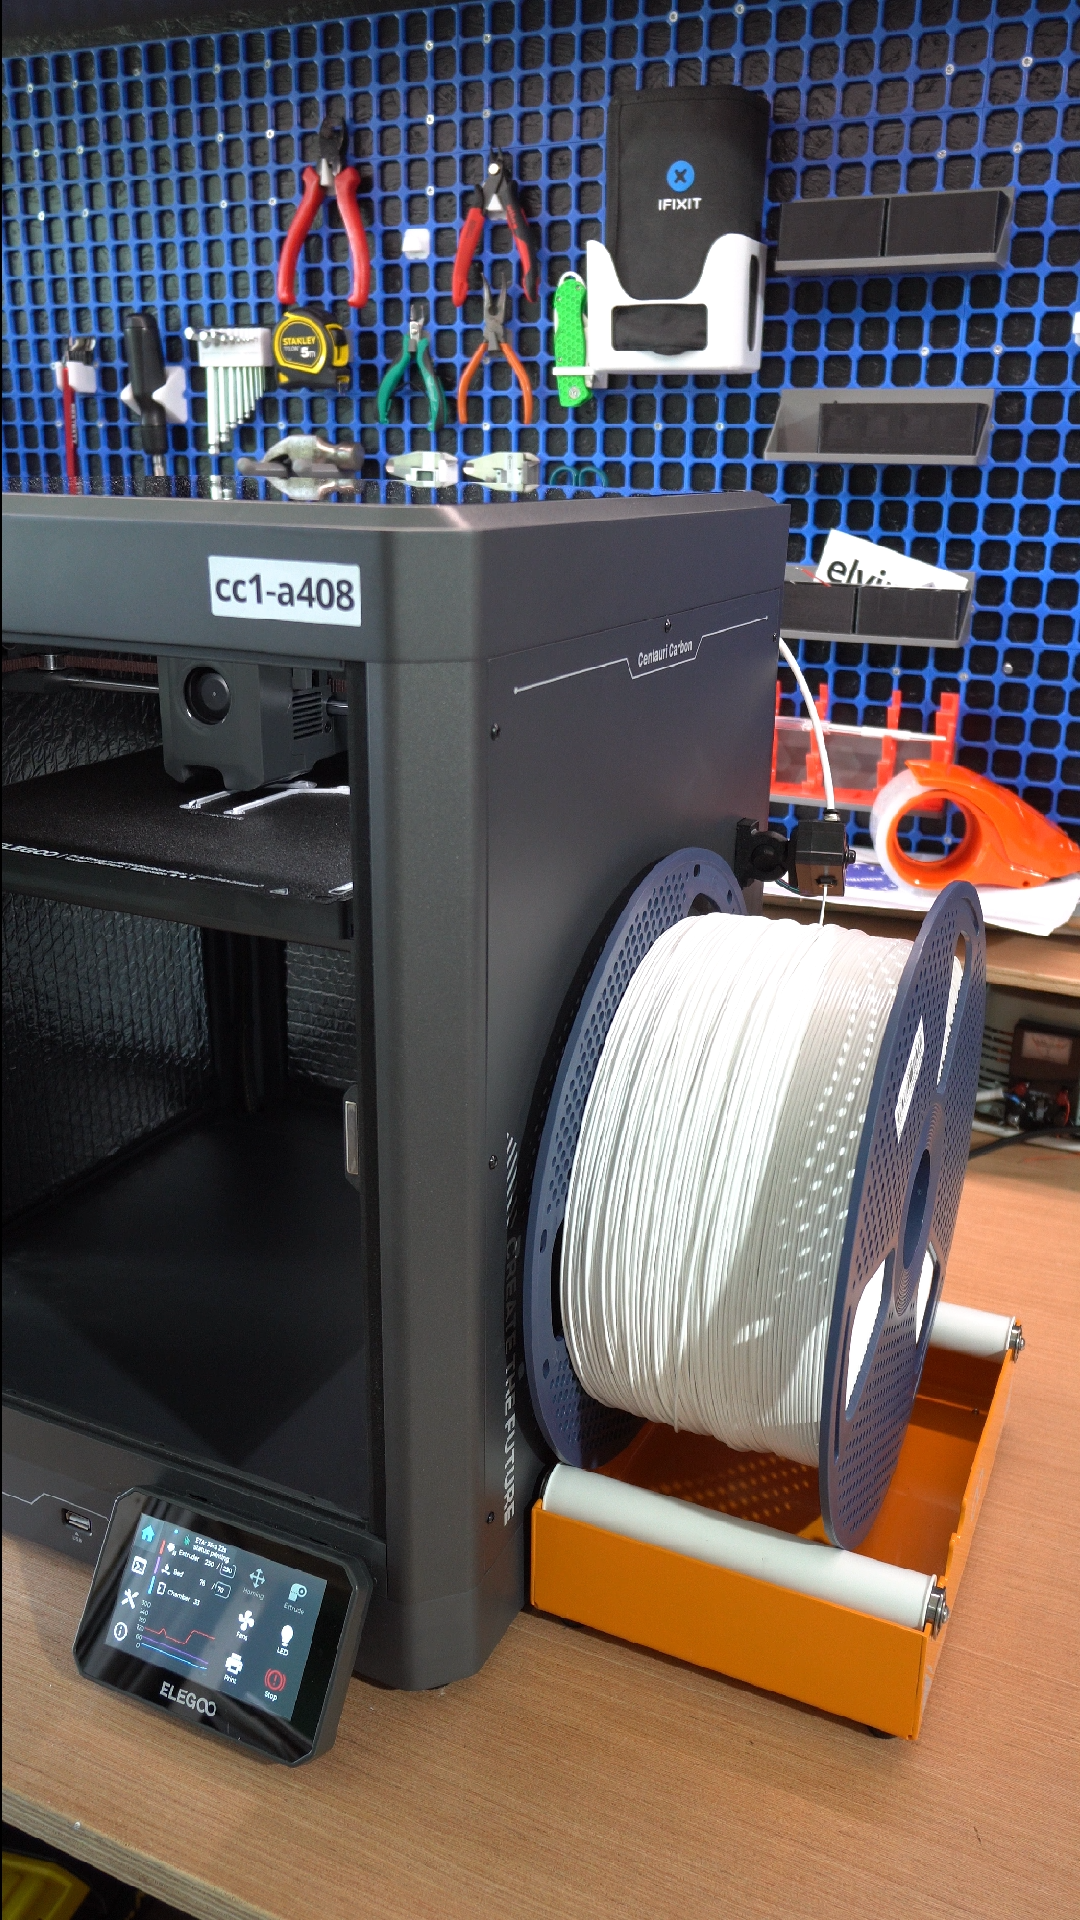
And with that, we now have a tangle-free printing experience (hopefully)! The final piece is to add in a way to hold the spool. There's no way this can hang off the included holder, so I picked up this ELEGOO 5KG Large Spool Holder that's meant to be used for their large-format printer line. The fact that it's also ELEGOO is a complete coincidence; they just happen to be one of the few companies that sell something like this. I did find it funny that included in the box is an orange version of the exact same filament sensor used on the Centauri Carbon. That went straight in the trash.
With that, I can now load on my 5kg spool, feed it into the printer and just keep on printing. I've got plans in the future to modify these printers to auto-eject parts, but for now that's just a dream. Automation is the future!
I use affiliate links for products that I use in my blog posts. The products themselves are chosen based on their merit and quality, and I buy them with my own money. If you get inspired by what I show, I'd appreciate you ordering via them so I get a small kickback, with no extra cost to you. Thanks for reading!